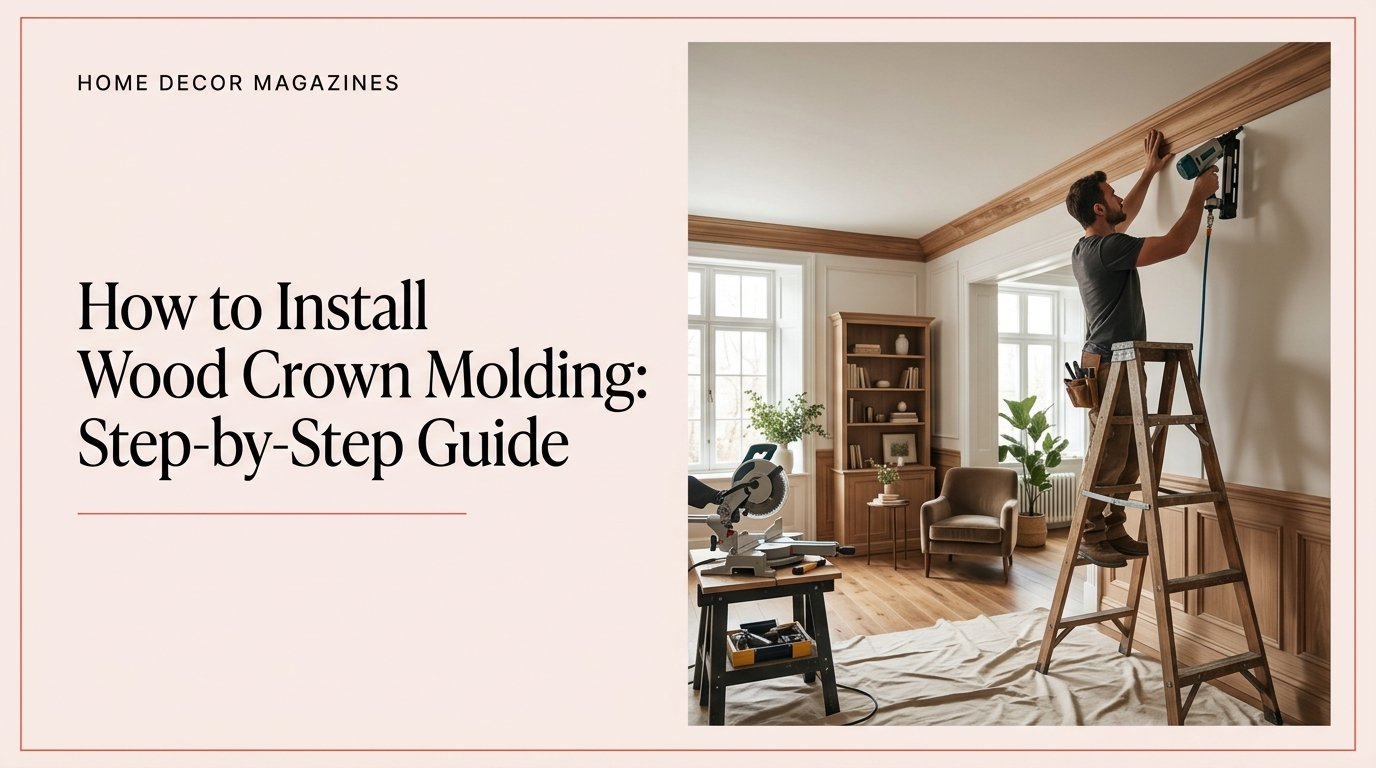
Installing wood crown molding is one of the best ways to give a room a finished, architectural look. It creates a decorative transition between the walls and ceiling while adding character and visual height to the space.
The project requires accurate measuring, careful cutting, and proper installation—especially around inside and outside corners. The most important techniques are coping inside corners, mitering outside corners, and using scarf joints when two pieces need to meet along a long wall.
This guide explains how to install wood crown molding from start to finish, including the tools you need, how to measure a room, how to cut crown molding, how to handle difficult corners, and how to finish the installation professionally.
Quick Takeway: How Do You Install Wood Crown Molding?
To install wood crown molding:
- Measure the room and calculate how much molding you need.
- Mark the bottom edge of the molding on the walls.
- Locate and mark wall studs and ceiling joists.
- Determine the molding’s spring angle and practice cuts on scrap pieces.
- Cut the first piece and install it with finish nails.
- Cope inside corners for a tight fit.
- Miter outside corners at the appropriate angle.
- Use scarf joints when joining pieces on long walls.
- Fill nail holes and small gaps.
- Sand, caulk, prime, and paint or stain the molding.
For wood crown molding, coping is generally the preferred technique for inside corners because it can accommodate minor irregularities and seasonal wood movement better than a simple mitered joint.
What Is Wood Crown Molding?
Wood crown molding is decorative trim installed where a wall meets the ceiling. Unlike flat trim, crown molding is installed at an angle, creating a transition that can make a room look more finished and traditional.
Common wood choices include:
- Pine
- Poplar
- Oak
- Maple
- Spruce
- Other hardwoods
Paint-grade woods such as pine and poplar are popular when the molding will be painted, while oak and maple can work particularly well for stained or natural-wood finishes.
Crown molding is available in many profiles, from simple modern designs to elaborate traditional patterns.
Tools and Materials You Need
Before starting, gather all your tools and materials.
| Tool or Material | Purpose |
|---|---|
| Wood crown molding | Main decorative trim |
| Tape measure | Measuring walls and molding |
| Pencil | Marking measurements and cuts |
| Compound miter saw | Cutting molding accurately |
| Coping saw | Cutting inside-corner profiles |
| Finish nailer | Fastening molding |
| Finish nails | Securing molding |
| Stud finder | Locating wall studs |
| Wood glue | Joining molding at corners |
| Wood filler | Filling nail holes |
| Caulk | Filling small gaps |
| Sandpaper | Smoothing joints and filler |
| Rasp or file | Fine-tuning coped cuts |
| Chalk line | Creating installation guidelines |
| Ladder | Reaching ceiling height |
| Safety glasses | Eye protection |
A compound miter saw makes crown molding installation considerably easier because it allows you to make accurate angled cuts. A coping saw is especially useful for inside corners.
Step 1: Measure the Room
Start by measuring every wall where crown molding will be installed.
Measure each wall individually rather than relying only on the overall room perimeter.
Example
If your room has four walls measuring:
- 12 feet
- 14 feet
- 12 feet
- 14 feet
The total perimeter is:
12 + 14 + 12 + 14 = 52 feet
Add extra material for cutting waste, mistakes, and corner joints.
A practical approach is to purchase approximately 10% more molding than your measured requirement.
Don’t Forget Obstacles
Check for:
- Doors
- Windows
- Built-in cabinets
- Fireplaces
- Sloped ceilings
- Ceiling height changes
- Columns
- Unusual wall angles
Planning the layout before cutting can save significant amounts of material.
Step 2: Plan the Installation Direction
Don’t simply start cutting the first piece you see.
Instead, plan the order in which the molding will be installed around the room.
A good installation plan should identify:
- Starting wall
- Inside corners
- Outside corners
- Long walls requiring scarf joints
- Molding termination points
- Returns
- Difficult angles
Planning the sequence helps reduce complicated cuts and makes the final piece easier to install.
Step 3: Mark the Bottom Edge of the Crown
Crown molding does not sit flat against the wall. It rests against both the wall and ceiling at an angle.
Use a small scrap piece of the actual crown molding as a template.
Hold the scrap against the wall and ceiling in its intended installation position.
Mark the bottom edge of the molding at each corner.
Then connect the marks using a chalk line.
This gives you a visual reference for keeping the molding at a consistent height around the room.
Why This Matters
Walls and ceilings aren’t always perfectly straight.
Instead of trying to make the molding follow every small imperfection, use your reference line to maintain a consistent overall appearance.
Step 4: Locate the Wall Studs and Ceiling Joists
Use a stud finder to locate the wall studs.
Mark their positions below the installation line.
Also identify ceiling joists where possible.
You want the finish nails to have solid backing.
For long walls, try to position joints where there is adequate support.
Step 5: Understand Crown Molding Orientation
One of the biggest mistakes beginners make is cutting crown molding in the wrong orientation.
When using a typical miter saw setup, crown molding is commonly positioned upside down against the saw fence.
Think of:
- The saw fence as the wall.
- The saw table as the ceiling.
This allows you to maintain the same relationship between the molding and the wall/ceiling while making your cuts.
Before cutting your expensive molding, practice with scrap pieces.
Step 6: Make Test Cuts First
Don’t immediately cut your finished pieces.
Use scraps of the same crown molding to create test corners.
This helps you determine:
- Correct saw orientation
- Correct angle
- Correct spring angle
- Which direction the corner runs
- Whether the molding fits tightly
A few test cuts can prevent an entire length of expensive molding from being wasted.
Step 7: Install the First Piece
Your first piece should ideally have a straightforward end.
Position the molding against the wall and ceiling.
Align its bottom edge with your chalk line.
Then fasten it using finish nails at the marked stud and joist locations.
A pneumatic finish nailer makes the process faster and helps produce smaller, less noticeable nail holes.
Drive the nails at appropriate angles through the molding into solid framing.
Step 8: Cope Inside Corners
Inside corners are where crown molding installation becomes more technical.
Instead of simply cutting two 45-degree miters, many professional installers use a coped joint.
What Is a Coped Joint?
A coped joint is created by cutting one piece of molding at an angle and then removing material behind the profile so the piece follows the shape of the adjoining molding.
This creates a tight-fitting corner.
How to Cope Crown Molding
- Cut the end of the molding at approximately 45 degrees.
- Use a pencil to highlight the edge of the profile.
- Follow that profile with a coping saw.
- Angle the saw slightly backward to remove material behind the profile.
- Smooth the cut with sandpaper or a file.
- Test-fit the piece against the installed molding.
- Make small adjustments until the joint fits tightly.
This technique is recommended for inside corners because it can produce a tighter joint than simply mitering both pieces.
Pro Tip
Don’t try to make the coped cut perfect in one pass.
Test the joint and remove small amounts of material with a rasp, file, or sandpaper until the pieces fit tightly.
Step 9: Install the Coped Piece
Once the coped end fits properly, position the molding against the wall.
Push the coped end tightly against the previously installed piece.
Check that:
- The bottom edge follows the reference line.
- The top edge meets the ceiling properly.
- The corner is tight.
- The molding sits consistently against the wall.
Then nail the molding into the marked framing locations.
Step 10: Cut Outside Corners
Outside corners require a different technique.
Unlike inside corners, outside corners are typically made using two opposing miter cuts.
For a standard 90-degree corner, the two pieces commonly receive opposing 45-degree cuts.
Apply wood glue to the mating surfaces and fasten the molding securely.
Before committing to your final pieces, make a small test corner from scraps. This helps confirm the direction of your cuts.
Outside walls are not always exactly 90 degrees, so irregular corners may require measuring the actual angle and dividing it between the two pieces rather than automatically assuming 45 degrees.
Step 11: Use Scarf Joints on Long Walls
Most crown molding comes in lengths that aren’t long enough to cover every wall.
When two pieces need to meet in the middle of a long wall, use a scarf joint rather than a straight butt joint.
A scarf joint uses opposing angled cuts.
How to Make a Scarf Joint
- Cut the end of the first molding at approximately 45 degrees.
- Cut the second piece at the opposite 45-degree angle.
- Apply wood glue to the joint.
- Slide the two pieces together.
- Align the molding with your reference line.
- Nail both pieces securely.
Whenever possible, position the joint over a stud or another solid fastening point.
A properly installed scarf joint is much less noticeable than a simple square butt joint.
Step 12: Deal With Uneven Walls and Ceilings
Older homes frequently have walls and ceilings that aren’t perfectly straight.
Don’t try to force the molding to follow every small dip.
Instead:
- Maintain the overall reference line.
- Secure the molding to available framing.
- Use caulk to hide small gaps.
- Use appropriate filler where necessary.
- Avoid excessive caulk on large gaps.
If a wall or ceiling is significantly uneven, you may need additional blocking or a customized installation approach.
Step 13: Install Crown Molding Around Angled Corners
Some rooms contain:
- Sloped ceilings
- Gambrel walls
- Angled transitions
- Cathedral ceilings
- Irregular architectural corners
These require more advanced measuring and cutting.
For unusual corners, create a small template using scrap molding first.
Test the template against the corner before cutting the finished pieces.
Sometimes crown molding doesn’t continue into another wall.
This allows you to determine the actual angle and identify where a filler piece may be necessary.
Step 14: Create a Crown Molding Return
Instead, it terminates partway along a wall.
A small return can be used to finish the exposed end.
A return essentially wraps the profile back toward the wall so you don’t see an unfinished cross-section.
Because the return piece can be very small, glue is often preferable to driving nails through it.
Step 15: Check Every Joint Before Final Nailing
Before permanently fastening a piece, inspect the joint.
Look for:
- Open corners
- Uneven miters
- Gaps at the ceiling
- Gaps at the wall
- Incorrect molding orientation
- Misaligned profiles
It is much easier to correct a piece before all the nails are installed.
Step 16: Fill Nail Holes
After all the molding is installed, fill the nail holes with wood filler or appropriate putty.
Allow the filler to dry according to the product instructions.
Then lightly sand the area until it is smooth.
Don’t overfill the holes because excessive filler creates additional sanding work.
Step 17: Caulk the Edges and Joints
Apply paintable caulk along small gaps between:
- Crown molding and ceiling
- Crown molding and wall
- Molding joints
Use a damp finger or appropriate caulking tool to smooth the bead.
Caulking is particularly useful for hiding minor variations between the molding and an imperfect wall or ceiling.
Important
Caulk is not a substitute for properly fitting joints.
If an inside corner has a large opening, recut or adjust the molding instead of trying to fill the entire gap with caulk.
Step 18: Sand the Crown Molding
Once the filler and other finishing materials are dry, lightly sand the repaired areas.
Pay particular attention to:
- Nail holes
- Outside corners
- Scarf joints
- Coped corners
- Filled imperfections
Wipe away dust before painting.
Step 19: Prime and Paint
If you’re using paint-grade wood, apply primer if required by the wood and paint system.
Then apply your chosen finish.
White crown molding remains a classic choice, but you can also use:
- Soft white
- Cream
- Warm beige
- Gray
- Black
- Same color as the walls
- Contrasting accent color
For a traditional look, crown molding is often painted white or another light color.
For a modern interior, painting the molding the same color as the wall can create a more seamless appearance.
Crown Molding Joint Types Explained
| Joint | Best Used For | Main Technique |
|---|---|---|
| Coped joint | Inside corners | Cut profile with coping saw |
| Mitered joint | Outside corners | Opposing angled cuts |
| Scarf joint | Long walls | Opposing angled cuts |
| Square/butt joint | Simple terminations | Straight cut |
| Return | Exposed molding ends | Small mitered end piece |
Understanding these joints is one of the most important parts of learning how to install crown molding.
Crown Molding Cutting Cheat Sheet
| Situation | Typical Approach |
|---|---|
| Inside corner | Cope one piece to the other |
| Outside corner | Two opposing miters |
| Long wall | Scarf joint |
| Molding ending at wall | Return or appropriate termination |
| Uneven corner | Measure actual angle and test-cut |
| Sloped ceiling | Create templates and test pieces |
The exact saw settings can vary depending on the molding profile and spring angle, so always make test cuts before cutting your finished material.
How Much Crown Molding Do You Need?
Calculate the total length of all walls receiving molding.
Then add approximately 10% for waste.
Example
Suppose your room requires:
60 linear feet
Add 10%:
60 × 1.10 = 66 linear feet
You would therefore purchase approximately 66 linear feet of molding.
If your room contains many complicated corners, angled walls, or difficult cuts, buying additional material can provide a useful safety margin.
How High Should Crown Molding Be?
Crown molding sits between the wall and ceiling, so its height is determined by the molding’s profile rather than by a separate installation height.
The key is maintaining the same relationship between the wall and ceiling throughout the room.
Use a scrap piece to establish the correct position and snap a reference line around the room.
How to Install Crown Molding Without a Nail Gun
You can install crown molding without a pneumatic nailer, but the process is slower.
Possible options include:
- Hammer and finish nails
- Manual nail set
- Construction adhesive where appropriate
- Brad nails for suitable small pieces
For wood crown molding, mechanical fastening into framing provides reliable support.
If using a hammer, predrilling pilot holes can reduce the risk of splitting, especially near molding ends.
Can You Install Crown Molding Over Drywall?
Yes.
Crown molding can be installed over drywall, but the fasteners should ideally reach wall studs or ceiling framing.
A stud finder can help locate the framing behind the drywall.
If there isn’t adequate framing in a particular location, additional blocking may be required.
Can You Install Crown Molding on Brick or Concrete?
Yes, but the installation method changes.
For masonry surfaces, construction adhesive may be necessary because standard finish nails cannot penetrate brick or concrete in the same way they penetrate wood framing.
You may also need appropriate masonry fasteners depending on the installation.
This Old House recommends construction adhesive for situations involving brick or concrete, combined with additional fastening where appropriate.
Common Crown Molding Installation Mistakes
1. Cutting Without Practicing
Crown molding cuts are easy to reverse accidentally.
Always practice with scrap pieces.
2. Installing the Molding Upside Down
Crown molding has a specific orientation.
Mark the wall side and ceiling side on a scrap piece before beginning.
3. Mitering Every Inside Corner
Two simple miters can open up over time.
Coping inside corners generally produces a more forgiving joint.
4. Measuring Only Once
Measure each wall carefully and double-check before cutting.
5. Assuming Every Corner Is 90 Degrees
Older houses and remodeled rooms can have slightly irregular corners.
Test-fit the joint before final installation.
6. Using Too Much Caulk
Caulk should hide small imperfections, not compensate for severely inaccurate cuts.
7. Forgetting Scarf Joints
A straight butt joint can create a very visible seam on a long wall.
An angled scarf joint generally produces a cleaner transition.
8. Not Supporting the Molding
Nailing only into drywall can result in loose molding.
Whenever possible, fasten into studs or ceiling joists.
9. Cutting Finished Pieces First
Always make a test cut using scrap material before committing to the final piece.
Tips for Professional-Looking Crown Molding
Use the Same Orientation Every Time
Keep the relationship between the molding, wall, and ceiling consistent when making cuts.
Practice on Scrap
Create small test corners before cutting expensive lengths.
Cope Inside Corners
Coped joints can hide small wall variations and provide a tight fit.
Glue Mitered Joints
A small amount of wood glue can help strengthen corner joints.
Keep Joints Away From the Most Visible Areas
If possible, place scarf joints where they are less noticeable.
Use Fine Sandpaper
Don’t aggressively sand detailed molding profiles.
Prime Before the Final Coat
Proper preparation produces a smoother painted finish.
Use Paintable Caulk
If you’re painting the molding, use a caulk designed to accept paint.
Is Installing Crown Molding Difficult?
Installing crown molding is a moderate DIY project.
The actual nailing is relatively simple. The difficult part is accurately measuring and cutting the molding.
The most challenging skills are:
- Understanding crown molding orientation
- Cutting inside corners
- Coping profiles
- Cutting outside corners
- Creating scarf joints
- Handling irregular walls
According to This Old House, crown molding installation is considered a moderate project and may take roughly a full workday for an average room depending on the complexity.
For beginners, the best approach is to practice on inexpensive scrap pieces before cutting the finished molding.
How Long Does Crown Molding Installation Take?
A typical room can take several hours, depending on:
- Room size
- Number of corners
- Molding profile
- Number of joints
- Wall condition
- Painting requirements
- Installer experience
A simple room with four relatively square corners is considerably easier than a room with multiple doors, windows, outside corners, angled walls, or sloped ceilings.
Frequently Asked Questions
Is it better to cope or miter crown molding?
For inside corners, coping is generally preferred because it can create a tighter and more forgiving joint. Outside corners are typically mitered.
What angle do you cut crown molding?
Many standard 90-degree outside corners use opposing 45-degree cuts, but the exact cut depends on the actual corner angle and the crown molding’s geometry.
Do you install crown molding upside down?
When cutting crown molding on a conventional miter saw using the nested method, the molding is commonly positioned upside down against the fence. The saw fence represents the wall and the saw table represents the ceiling.
Should crown molding touch the ceiling?
Yes. Crown molding is designed to transition between the wall and ceiling. Small irregular gaps can be filled with paintable caulk, but large gaps usually indicate that the molding needs adjustment.
Do you nail crown molding into the ceiling or wall?
Ideally, crown molding is fastened into available wall studs and ceiling joists for secure attachment.
Can you install crown molding yourself?
Yes. A homeowner with basic carpentry skills can install crown molding, but accurate cutting—particularly coping inside corners—is the most challenging part.
Should crown molding be glued?
Wood glue is useful for joining molding at mitered or other appropriate joints. Mechanical fastening is still important for securing the molding to framing.
What is the easiest way to install crown molding?
The easiest approach is to carefully plan the layout, use scrap pieces for test cuts, establish a reference line, and install one section at a time. Corner blocks can also simplify installation because they can reduce the need for complicated corner cuts.
Can crown molding make a room look bigger?
Yes. Crown molding can create a stronger visual transition between the walls and ceiling and make the room feel more architecturally finished. The effect depends on the molding profile, ceiling height, color, and overall room design.
Final Thoughts
Learning how to install wood crown molding is mostly about precision rather than complicated tools. Once you understand how to position the molding and make inside, outside, and scarf joints, the process becomes much easier.
The key steps are to measure carefully, establish a consistent installation line, practice cuts on scrap material, cope inside corners, miter outside corners, fasten the molding securely, and finish the joints with filler and caulk.
Take your time with the first few corners. A carefully fitted joint will make a much bigger difference to the final appearance than trying to finish the project quickly.